
Are you looking to elevate your baking game with the rich, intense flavor of vanilla bean paste? This comprehensive guide will show you how to make your own vanilla bean paste at home, saving you money while ensuring you have the highest quality ingredient for your culinary creations. With its unique flavor profile and beautiful specks of vanilla seeds, vanilla bean paste is a must-have for any serious baker or home cook. Follow this vanilla bean paste recipe to create a delicious and versatile ingredient that will enhance your desserts.
What is Vanilla Bean Paste?
Vanilla bean paste is a thick, concentrated form of vanilla extract that contains real vanilla bean seeds. It combines the convenience of vanilla extract with the visual appeal and intense flavor of whole vanilla beans. This versatile ingredient has become increasingly popular among home bakers and professional pastry chefs alike.
Benefits of Homemade Vanilla Bean Paste
Making your own vanilla bean paste at home comes with several advantages:
- Pure, Natural Ingredients: Homemade vanilla bean paste allows you to control the quality of the ingredients, ensuring that you avoid additives and preservatives often found in commercial products.
- Cost-Effective: While high-quality vanilla beans can be an investment, making your own paste is often cheaper than buying premium store-bought versions.
- Customizable Concentration: You can adjust the concentration of vanilla flavor to suit your personal taste or the requirements of your recipes.
- Fresh, Intense Vanilla Flavor: Homemade paste offers a fresher taste compared to many commercial options, which may have been sitting on shelves for extended periods.
- Visual Appeal: The beautiful specks of real vanilla seeds in your baked goods add an elegant touch to desserts.
- Long Shelf Life: When stored properly, homemade vanilla bean paste can last for months, making it a convenient staple in your kitchen.
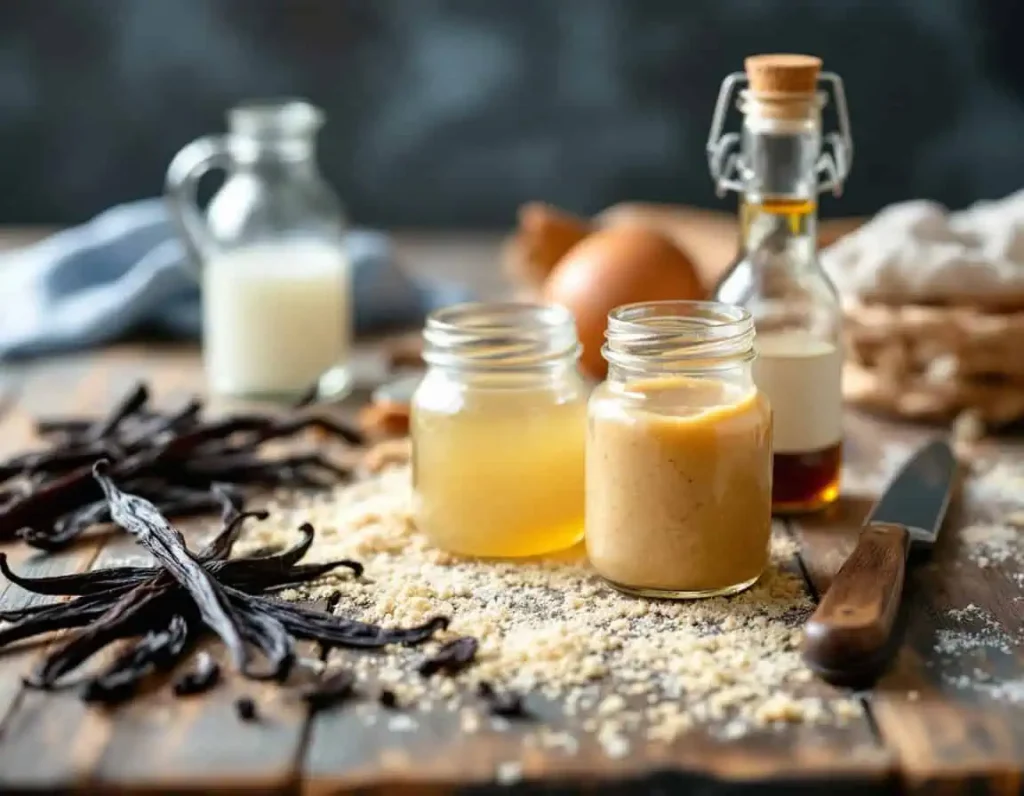
Essential Ingredients for Vanilla Bean Paste
Primary Components
To make your own vanilla bean paste, you will need the following ingredients:
- Whole Vanilla Beans: Madagascar or Tahitian vanilla beans are the most commonly used varieties. Madagascar beans are known for their rich, creamy flavor, while Tahitian beans offer a more floral and fruity profile.
- Pure Vanilla Extract: This enhances the flavor and helps to create a smooth consistency.
- Light Corn Syrup or Sugar Syrup: This thickens the paste and adds sweetness. You can also use agave syrup or honey as alternatives.
- Water: Used to adjust the consistency of the paste.
- Optional: Vodka: Adding a small amount of vodka can help preserve the paste and enhance its flavor.
Equipment Needed
Before you start, gather the following equipment:
- Sharp Knife: For splitting the vanilla beans.
- Cutting Board: To work on while preparing the beans.
- Small Saucepan: For heating the mixture.
- Glass Jar for Storage: To keep your vanilla bean paste fresh.
- Strainer (if desired): To remove any larger pieces if you prefer a smoother paste.
- Food Processor or Blender: For mixing the ingredients thoroughly.
Step-by-Step Vanilla Bean Paste Recipe
1. Prepare the Vanilla Beans
The first step in making vanilla bean paste is to prepare the vanilla beans:
- Split the Beans: Using a sharp knife, carefully split the vanilla beans lengthwise. This will expose the seeds inside.
- Scrape Out the Seeds: Use the back of the knife to scrape out the tiny black seeds from the inside of the beans. Be sure to collect all the seeds, as they are the key to the flavor and visual appeal of your paste.
- Keep Both Seeds and Pods: Don’t discard the empty pods; they can be used to infuse flavor into other recipes or to make vanilla sugar.
2. Create the Base
Now that your vanilla beans are prepared, it’s time to create the base for your vanilla bean paste:
- Combine Scraped Seeds with Vanilla Extract: In a small saucepan, combine the scraped seeds with pure vanilla extract. This will help to distribute the flavor evenly.
- Add Light Corn Syrup: Pour in the light corn syrup (or your chosen sweetener) and mix thoroughly until well combined. The syrup will help thicken the paste and add sweetness.
- Mix Thoroughly: Use a whisk or spoon to ensure that the seeds are evenly distributed throughout the mixture.
3. Infuse the Mixture
To enhance the flavor and achieve the right consistency, you’ll need to infuse the mixture:
- Heat Mixture on Low Temperature: Place the saucepan over low heat. This will help to dissolve the syrup and blend the flavors without cooking the mixture.
- Stir Occasionally: Stir the mixture occasionally to prevent it from sticking to the bottom of the pan.
- Simmer for 5-7 Minutes: Allow the mixture to simmer gently for about 5-7 minutes. This will help to concentrate the flavors.
- Remove from Heat: Once the mixture has thickened slightly, remove it from the heat and let it cool completely.
4. Final Processing
After the mixture has cooled, it’s time to finalize your vanilla bean paste:
- Transfer to Storage Container: Pour the cooled mixture into a clean glass jar or container. Make sure to scrape out all the mixture from the saucepan.
- Add Vodka if Using: If you choose to add vodka for preservation, pour a small amount into the jar and mix well.
- Seal Tightly: Close the jar tightly to prevent air from entering, which can affect the flavor and shelf life.
- Label with Date: Don’t forget to label your jar with the date you made the paste. This will help you keep track of its freshness.
Storage and Shelf Life
To ensure your homemade vanilla bean paste stays fresh and flavorful, follow these storage tips:
- Store in an Airtight Container: Use a glass jar with a tight seal to keep out air and moisture.
- Keep in a Cool, Dark Place: Store your vanilla bean paste in a pantry or cupboard away from direct sunlight and heat sources.
- Shelf Life: When stored properly, homemade vanilla bean paste can last anywhere from 6 to 12 months. The flavor may intensify over time, making it even more delicious.
- Refrigeration: While refrigeration is not necessary, it can extend the longevity of your paste. Just be sure to bring it back to room temperature before using.
Using Your Homemade Vanilla Bean Paste
Conversion Guidelines
One of the great things about vanilla bean paste is its versatility. Here are some conversion guidelines to help you use it in your recipes:
- 1 tablespoon of paste = 1 whole vanilla bean: This is a great way to substitute if you don’t have whole beans on hand.
- 1 tablespoon of paste = 1 tablespoon of vanilla extract: You can easily swap vanilla bean paste for vanilla extract in most recipes.
Best Uses for Vanilla Bean Paste
Vanilla bean paste can be used in a variety of recipes, including:
- Ice Cream and Custards: The rich flavor of vanilla bean paste is perfect for homemade ice cream and custards, adding depth and visual appeal.
- Buttercream Frosting: Incorporate vanilla bean paste into your buttercream frosting for a gourmet touch on cakes and cupcakes.
- Cakes and Cookies: Use it in your favorite cake and cookie recipes to enhance the vanilla flavor.
- Pastry Creams: Vanilla bean paste is an excellent addition to pastry creams, adding both flavor and texture.
- Puddings: Elevate your pudding recipes with the rich flavor of vanilla bean paste.
- Glazes: Use it in glazes for donuts or pastries to add a touch of elegance.
Tips for Perfect Vanilla Bean Paste
To ensure your vanilla bean paste turns out perfectly every time, keep these tips in mind:
- Choose High-Quality Vanilla Beans: The quality of your vanilla beans will directly impact the flavor of your paste. Look for plump, moist beans with a strong aroma.
- Don’t Rush the Infusion Process: Allowing the mixture to simmer gently will help develop the flavors. Patience is key!
- Maintain Consistent Temperature: Avoid high heat, as this can cook the mixture and alter the flavor.
- Store Properly for Longevity: Follow the storage tips mentioned above to keep your paste fresh.
- Label Clearly with Date Made: This will help you keep track of how long your paste has been stored.
Troubleshooting Common Issues
Even with the best intentions, you may encounter some issues while making your vanilla bean paste. Here are some common problems and their solutions:
Too Thick?
If your vanilla bean paste turns out too thick, you can easily fix it:
- Add Small Amounts of Vanilla Extract: Gradually add small amounts of vanilla extract until you reach your desired consistency.
Too Thin?
If your paste is too thin, don’t worry:
- Simmer Longer: Return the mixture to low heat and simmer for a bit longer to reduce the liquid content and thicken it up.
Crystallization?
If you notice crystallization in your vanilla bean paste:
- Gently Warm and Stir: Place the jar in warm water or gently heat it to reconstitute the paste, stirring until smooth.
FAQs About Vanilla Bean Paste
Is vanilla bean paste better than extract?
While both have their uses, vanilla bean paste offers visual appeal with vanilla seeds and typically provides a more intense flavor profile. It’s especially favored in recipes where the appearance of the seeds enhances the dish.
Can I substitute vanilla extract for vanilla bean paste?
Yes, but you’ll miss the visual appeal of the seeds and may need to adjust quantities for equivalent flavor intensity. Generally, you can use the same amount of extract, but the flavor may not be as rich.
How long does homemade vanilla bean paste last?
When properly stored, homemade vanilla bean paste can last 6-12 months. The flavor may intensify over time, making it even more delicious.
Is vanilla bean paste worth the cost?
Making your own vanilla bean paste is cost-effective compared to store-bought versions and allows quality control over ingredients. Plus, the flavor and freshness of homemade paste are often superior.
Can I use vanilla bean paste in any recipe?
Yes, it works well in most recipes calling for vanilla extract or vanilla beans, particularly in items where the seeds will be visible. It’s perfect for desserts, sauces, and even savory dishes.
Quality Control and Best Practices
To ensure the best results when making vanilla bean paste, consider the following quality control measures:
- Use Fresh, Pliable Vanilla Beans: Check for freshness by ensuring the beans are flexible and aromatic.
- Ensure Clean, Sterilized Equipment: This prevents contamination and helps maintain the quality of your paste.
- Monitor Temperature Carefully: Avoid overheating the mixture, as this can alter the flavor.
- Test Consistency Before Storing: Make sure the paste has the desired thickness before transferring it to a jar.
- Label with Production Date: This will help you keep track of how long your paste has been stored.
Sustainability and Cost Considerations
Environmental Impact
When making vanilla bean paste, consider the following sustainability practices:
- Reuse Vanilla Bean Pods: After scraping the seeds, don’t throw away the empty pods. They can be used to infuse flavor into sugar or other liquids.
- Choose Sustainably Sourced Vanilla: Look for brands that prioritize sustainable farming practices to support the environment and local communities.
- Minimize Waste Through Proper Storage: Properly storing your paste will help reduce waste and ensure you get the most out of your ingredients.
- Use Eco-Friendly Packaging: If you’re giving your vanilla bean paste as a gift, consider using recyclable or biodegradable packaging.
Cost Analysis
When evaluating the cost of making your own vanilla bean paste, consider the following:
- Initial Investment in Quality Beans: While high-quality vanilla beans can be pricey, the cost per batch is often lower than buying premium store-bought paste.
- Long-Term Savings Versus Store-Bought: Over time, making your own paste can save you money, especially if you bake frequently.
- Bulk Purchasing Advantages: Buying vanilla beans in bulk can further reduce costs and ensure you always have this essential ingredient on hand.
- Value Added to Baked Goods: The superior flavor and quality of homemade vanilla bean paste can elevate your baked goods, making them more enjoyable and impressive.
Creative Uses for Vanilla Bean Paste
Beyond Basic Baking
Vanilla bean paste is incredibly versatile and can be used in a variety of creative ways:
- Flavored Coffee or Tea: Add a spoonful of vanilla bean paste to your morning coffee or tea for a delicious twist.
- Homemade Ice Cream: Use it as a base for homemade ice cream, enhancing the flavor and texture.
- Breakfast Dishes: Stir it into oatmeal, yogurt, or pancake batter for a delightful breakfast treat.
- Savory Applications: Experiment with adding vanilla bean paste to savory dishes, such as sauces or marinades, for a unique flavor profile.
- Cocktail Ingredients: Use it in cocktails for a sophisticated touch, adding depth to drinks like martinis or mojitos.
Conclusion
Making your own vanilla bean paste is a rewarding process that results in a superior product compared to many commercial alternatives. With proper technique and quality ingredients, you can create this versatile baking staple at home. Not only will you save money in the long run, but you’ll also have the satisfaction of using a homemade ingredient in your culinary creations.
Remember to store your vanilla bean paste properly and experiment with different applications to make the most of this wonderful ingredient. Whether you’re baking a cake, making ice cream, or adding a touch of luxury to your morning coffee, vanilla bean paste is sure to impress. Follow this vanilla bean paste recipe and enjoy the rich flavors it brings to your kitchen. Happy baking!